Neuroscientist and science blogger, who recently discovered the magic of automation to organize her professional life.
Do you have documents that you need to apply a company header? Or maybe you want to datestamp incoming PDFs with the date received? You do this easily using PushPDF and Zapier. I’ll show you how you can automate your custom header in 3 easy steps.
If you are new to PushPDF, see our getting started guide
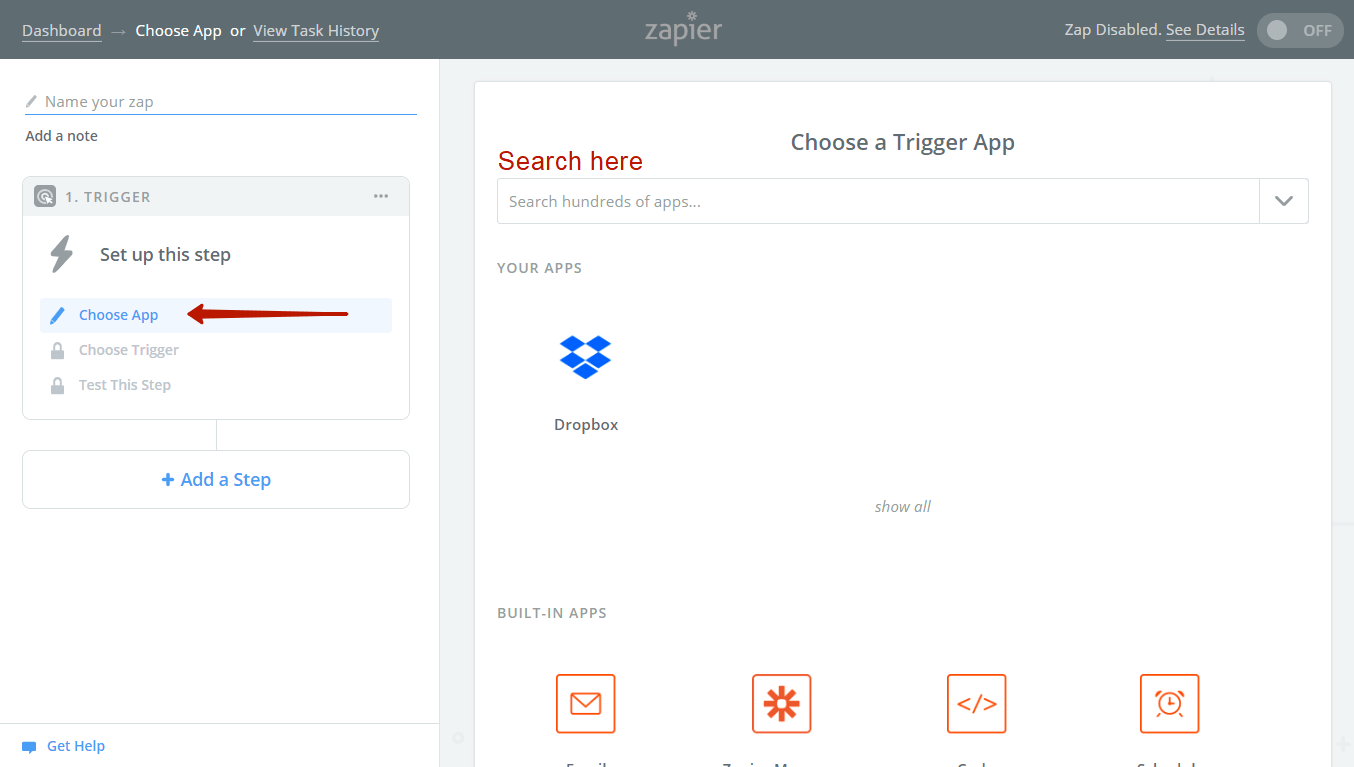
In Zapier, create a Trigger Step that will generate the file you want to add the header to. This can be a new email attachment or a new file in a Dropbox folder. Once this zap is active, this will be the only step you will need to perform manually.
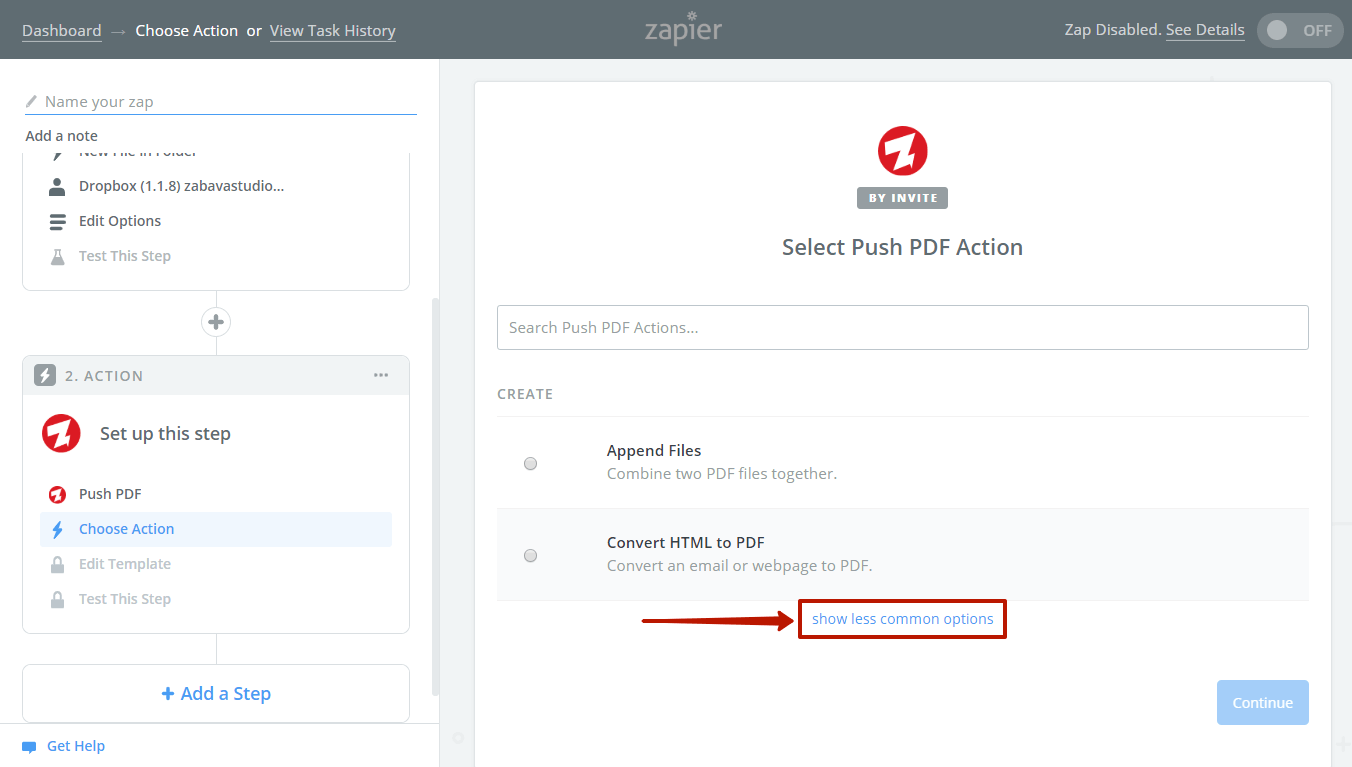
Once the trigger is set up, you can create a new Action Step using PushPDF. Choose ‘Add Header’ from the list in Choose Actions. If “Add Header” is not shown, then click on 'show less common options'.
Select your PushPDF account.
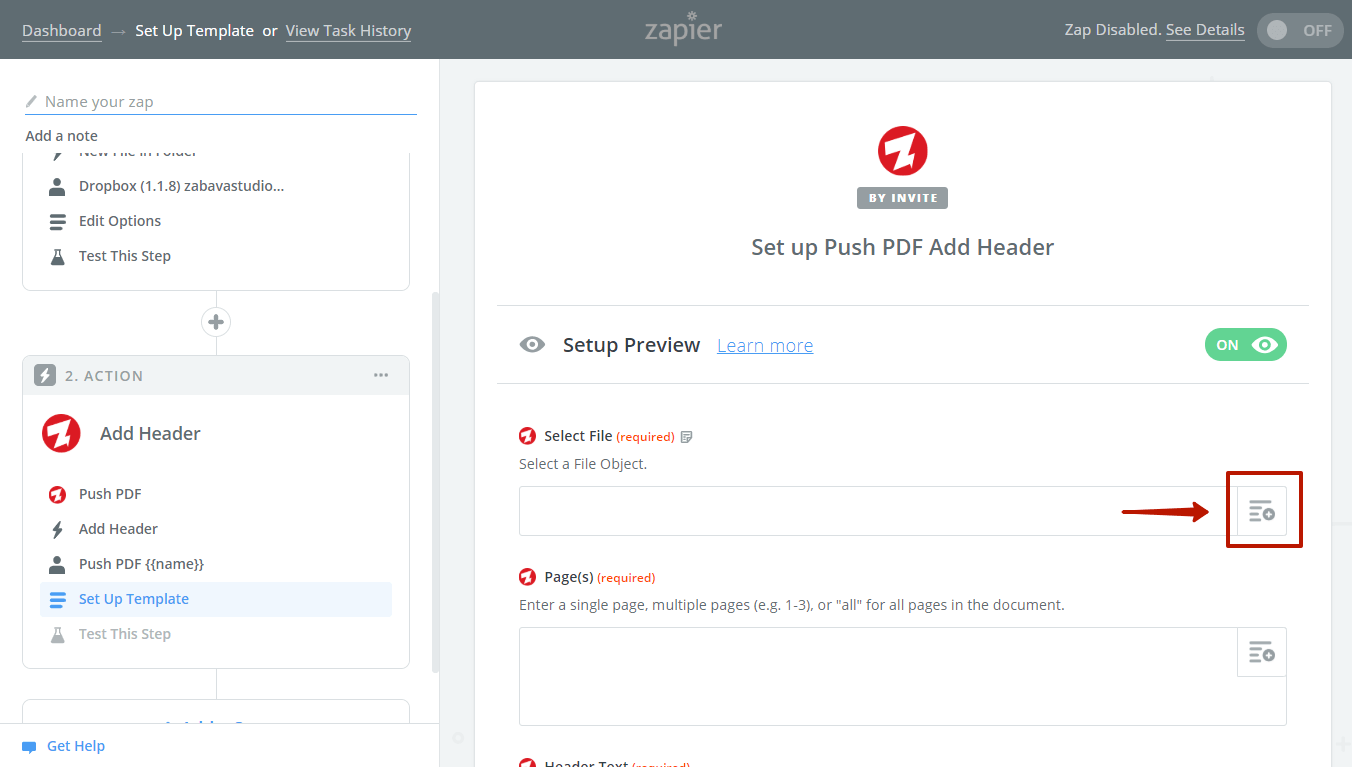
Choose the file you generated with trigger using the Insert Field button.
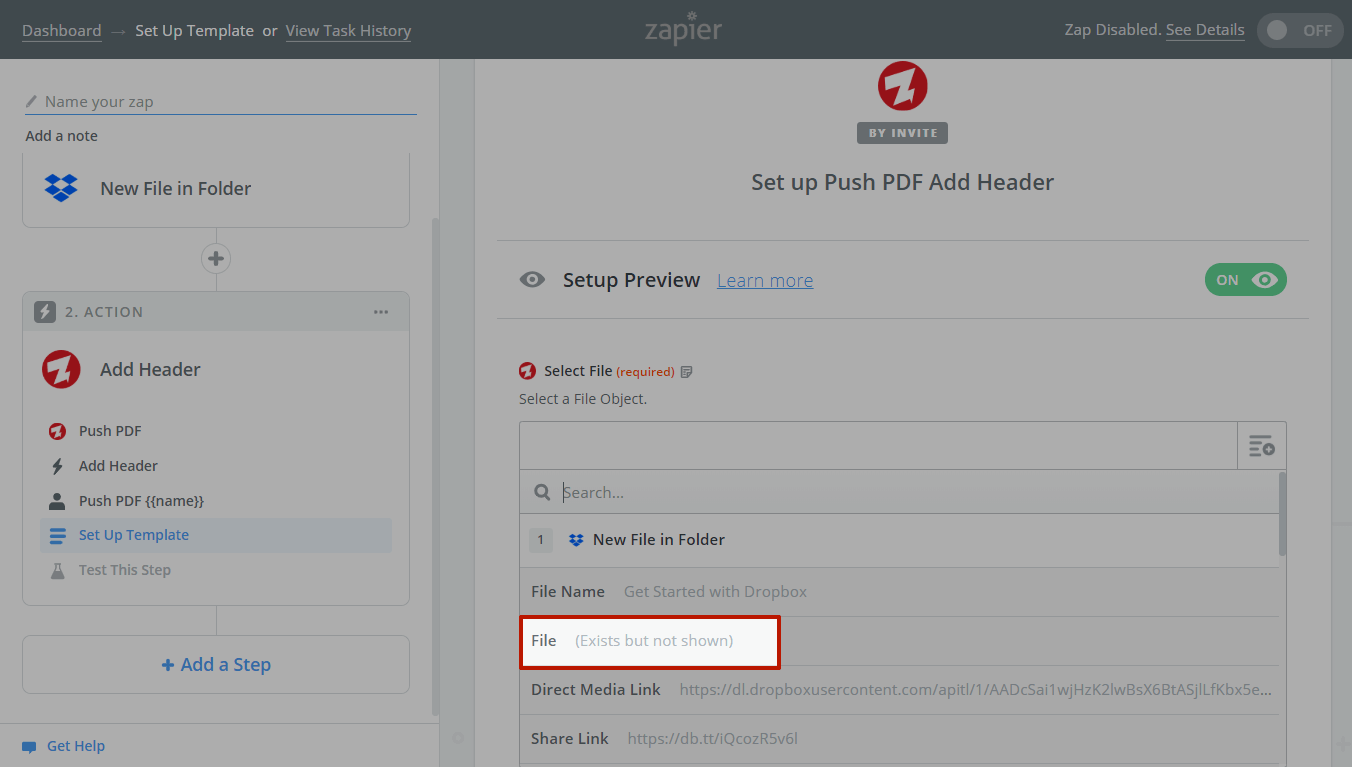
The description will read “Exists but not shown”. This is how Zapier displays file objects.
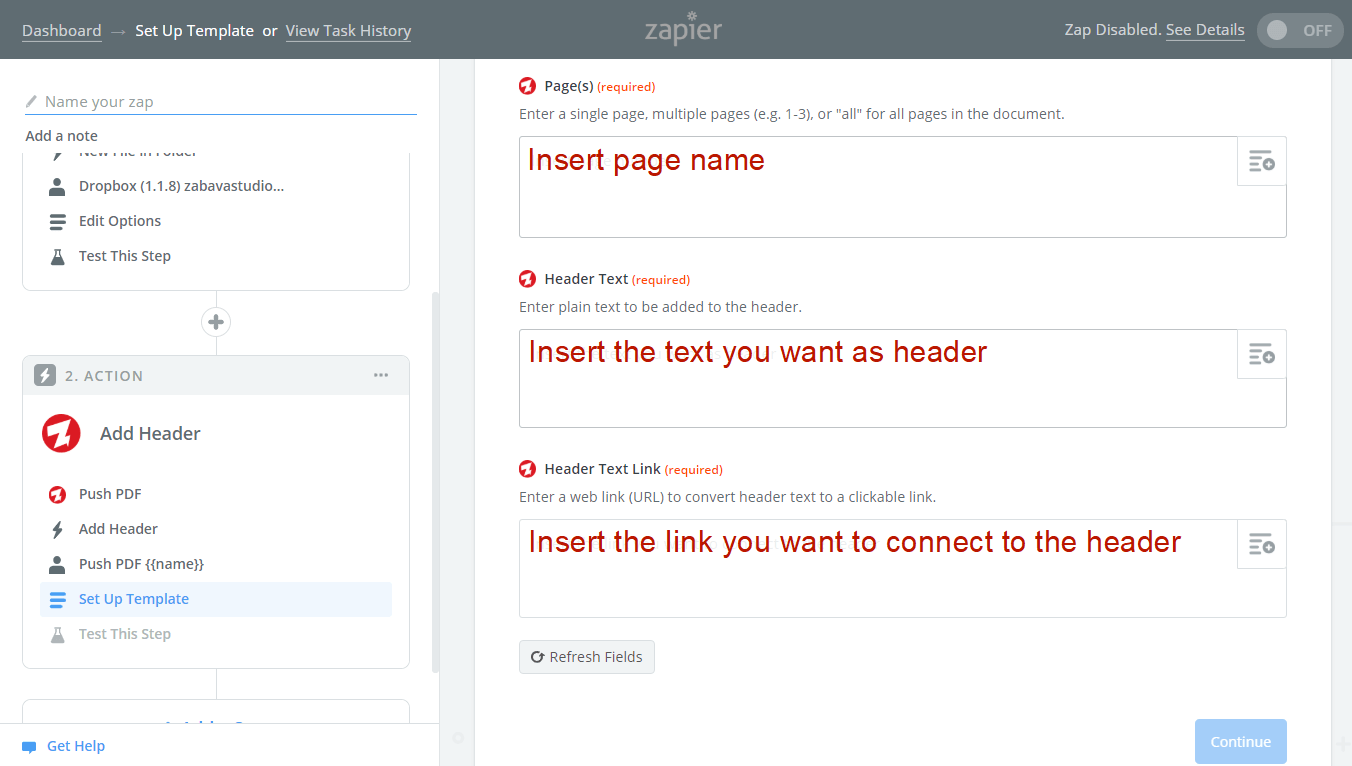
Simply enter the page number and the text and hyperlink you want to be added as a header.
Test this step and decide on an appropriate delivery method for your file. Some examples include:
Email the PDF back to yourself
Upload to a Dropbox or Google Drive folder
Attach to a Slack Channel Message
Set up multiple zaps to add different headers to different files. It can not only save you time but also save you from the hassle of manually adding headers and ensuring that the formatting is perfect..
If you need some help or have questions contact us directly at support@pushpdf.app or by contact form
No spam, we promise